How to Create the Perfect Christmas Wreath for Under $15
- Tia Astrain
- Nov 23, 2019
- 2 min read

With Christmas right around the corner, Christmas decorations have begun to pop up everywhere. The trees, the lights, the yummy treats-it can all add up pretty quickly! Here at Astrain Design, we are all about saving money while still making our home a Christmas wonderland. Let us show how possible it is to have the wreath of your dreams! In this tutorial we will show what you need, where to get it, and how to make a beautiful Christmas wreath that won't break the bank!
Step 1: Get the Materials

For this wreath you will need:
A hot glue gun
8-12 bundles of pre-made decorative holly (Dollar Tree)
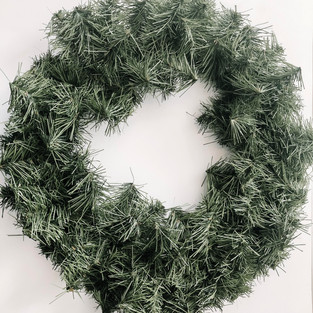
A base wreath (I got mine from Walmart for only $2.88!)
Scissors or wire cutters
Decorative mesh (Dollar Tree)
A bow of your choosing (Dollar Tree) *optional
I ended up liking my finished wreath without the red bows, but it is totally up to you to decide what you like.
Step 2: Cut your bunches
The next step you'll want to take is to use your scissors or wire cutters to begin cutting pieces from your holly bunches. The bunches that I chose had mainly red and gold faux berries, as well as plain pine cones and gold-dipped pine cones. Cutting them into individual pieces will allow you to play around with them and find the best placement for them on your wreath.
Step 3: Choose where you'll place your items

The most important step is to decide you want the majority of your items to be placed on your base wreath. I decided to go with the popular off-center placement to the left. Play around with your wreath and try different placements. This is a time to see what is going to look good and what you want for your wreath!
Step 4: Laying down your first layer

For my first step of gluing to the base, I cut my decorative mesh into 8-10 inch strips. I then twisted each trip to give it a curlier/softer look. I then placed the white decorative mesh in the bottom left corner I began gluing these pieces to the wreath base.
Step 5: Adding the pretty stuff

The next layer is where things get exciting! Most of my bundles contained pine cones so I decided to concentrate the majority of my pine cones in the middle of my decorative mesh. I also added my longer stems of twigs and berries poking out from the pine cones. I began to build upon the berries, twigs, and pine cones and fan them out to fluff up the wreath and give it some texture.
Step 6: The final touches

The last thing to do is analyze your wreath. Add a pine cone of berry sprig, or twist your decorative mesh a bit. Your glue gun is your BEST FRIEND! Use it!
To top of my wreath I hot glued a small ornament that said "Joy" onto the center of the pine cones.
Step 7: Hang it up and ADMIRE your work!
Make sure to hang your wreath where everyone can see it and compliment your craftiness! Oh, and don't forget to tell them you made it for under $15!


Comments